


THHN wire, or Thermoplastic High Heat-resistant Nylon-coated wire, is a versatile electrical conductor commonly used in residential, commercial, and industrial applications. Proper installation and routing of THHN wire or wire THHN are crucial to ensure its longevity, efficiency, and compliance with safety standards. This article provides a detailed guide to installing and routing THHN wire, covering everything from preparation and tools to techniques and best practices.


Understanding THHN Wire
Before diving into installation, it's important to understand the key characteristics of THHN wire that impact its handling:
Voltage and Temperature Ratings:
Rated for up to 600 volts.
Can operate at temperatures of up to 90°C in dry environments and 75°C in damp environments.
Nylon Coating:
Offers abrasion resistance, smooth pulling through conduits, and protection from minor environmental factors.
Applications:
Used for general wiring, power distribution, and motor connections in dry or damp locations.

Tools and Materials Required
To install and route THHN wire, you'll need the following tools and materials:
Tools:
Wire strippers and cutters
Fish tape or conduit pullers
Screwdrivers
Multimeter (for testing circuits)
Labeling tools (for identifying wires)
Materials:
THHN wire in the appropriate gauge and color
Electrical conduit (PVC, EMT, or rigid metal)
Conduit fittings and connectors
Junction boxes
Cable ties

Preparation for Installation
Assess the Wiring Needs
Determine the voltage, current, and application to select the correct gauge of THHN wire.
Refer to local electrical codes and the National Electrical Code (NEC) for compliance.
Plan the Routing Path
Identify the shortest and most efficient route for the wires.
Minimize sharp bends and obstacles to reduce stress on the wire.
Prepare the Conduits
Measure and cut the conduit to the required length.
Use a deburring tool to smooth the edges to prevent damage to the wire's insulation and nylon coating.

Steps for Installing and Routing THHN Wire
Step 1: Install the Conduit System
THHN wire must be installed within conduits for protection and compliance with NEC standards.
Install the Conduit:
Use appropriate types of conduit, such as PVC for outdoor installations or EMT for indoor use.
Secure the conduits to walls, ceilings, or floors using mounting brackets.
Check Fittings and Connectors:
Ensure all conduit fittings are tight and sealed, especially in damp environments.
Inspect the Conduit Path:
Confirm that the route is clear of debris or obstructions.

Step 2: Pull the THHN Wire Through the Conduit
Prepare the Wires:
Cut the THHN wire to the required length, allowing extra slack for connections.
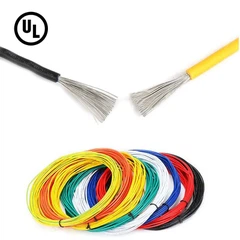
Use different-colored wires for phase, neutral, and ground connections for easy identification.
Feed the Wire:
Attach the THHN wire to fish tape or a conduit puller.
Lubricate the wires with a wire-pulling lubricant to reduce friction during installation.
Pull the Wire:
Slowly pull the fish tape through the conduit, guiding the THHN wire into place.
Avoid excessive force to prevent damage to the insulation or nylon coating.
Secure the Wire:
Use cable ties or clamps to organize and secure the wires inside junction boxes or distribution panels.

Step 3: Make Connections
Strip the Wire Ends:
Use a wire stripper to remove the nylon coating and insulation from the ends of the THHN wire, exposing the conductor.
Connect to Terminals:
Secure the stripped wire ends to terminal blocks, switches, or receptacles using screws or clamps.
Follow the wiring diagram for proper connections.
Label the Wires:
Use labeling tools to identify each wire's function (e.g., phase, neutral, ground).

Best Practices for Routing THHN Wire
1. Minimize Bends and Strain
Avoid sharp bends in the conduit to prevent stress on the THHN wire.
Use wide-radius bends for smoother routing.
2. Bundle Wires Appropriately
When routing multiple wires, bundle them neatly to avoid tangling or crowding.
Leave enough space in the conduit to prevent overheating.
3. Protect Against Environmental Factors
Use sealed conduits and weatherproof fittings in outdoor or damp environments.
Ensure proper grounding to enhance safety and system reliability.

Testing and Finalizing Installation
Conduct Electrical Tests
Use a multimeter to test the continuity, voltage, and resistance of the installed THHN wire.
Check for proper grounding and ensure no short circuits are present.
Secure Connections
Double-check all terminal and junction box connections for tightness and correctness.
Inspect the Installation
Verify that the installation complies with local electrical codes and safety standards.

Common Mistakes to Avoid
Using Incorrect Wire Gauge
Selecting a gauge that is too small can lead to overheating and voltage drop issues.
Skipping Lubrication
Failing to lubricate wires during pulling can cause damage to the nylon coating.
Overcrowding the Conduit
Overloading a conduit with too many wires can result in overheating and make future maintenance difficult.
Improper Grounding
Ensure all THHN wires are properly grounded to prevent electrical hazards.

Applications of THHN Wire Installation
Properly installed THHN wire is used in:
Residential Systems:
Lighting, outlets, and appliance wiring.
Commercial Systems:
Power distribution and office wiring.
Industrial Systems:
Machinery, control panels, and HVAC systems.